By Mike Rosso
In the previous installment of this series, the drywall had been hung, finished, primed and painted. While this was happening, the stucco crew came back and did the exterior finish coat. At this point, the exterior is finished; doors and windows are hung and the exterior lights have been installed.
Inside, Kenny the finish carpenter is busy at work. All interior doors have been hung and the kitchen and bathroom cabinets have been installed. The trim work has begun. The door trim, window sills and baseboard are made from locally-milled aspen and coated with polyurethane. It is a nice compliment to the native spruce used for the ceiling beams. The concrete floor has been grouted and polished and awaits a sealant.
While the finish carpentry was going on, there was the matter of setting tile in the tub/shower enclosure. I chose a 12×18-inch field tile with a 4-inch accent feature, found locally at First Street Flooring. Before tiling, a cement board (HardieBacker) was put in place as an underlayment. After it is installed, a red waterproofing membrane is painted on. I used a product called RedGard. My buddy Jim offered to install both the cement board and the tile. I added a little more sweat equity to the project by doing the waterproofing. After the tile was installed and grouted, we chose to trim it out with galvanized black metal for a unique, somewhat industrial look.
Now the plumbing fixtures were installed and tested, such as the kitchen and bathroom sinks, faucets and handles, the toilet and a guest pedestal sink. The well water runs through a filter and is quite tasty. (The water heater and pressure tank were installed beforehand.)
I should also mention that the finishing touches to the indoor electric occurred after the paint. To satisfy the bank for the loan, I needed a “traditional” form of heat, something besides a wood stove and passive solar. For that purpose, I chose Comfort Cove radiant heaters, which are long and narrow and mounted on the walls near the ceiling. Each room has its own thermostat, creating a zone heating system. Though mounting heating units near the ceiling seems counter intuitive, these units actually radiate heat downwards, heating objects, not the air. I used them sparingly this past winter and they worked great with little net effect on my electric bills.
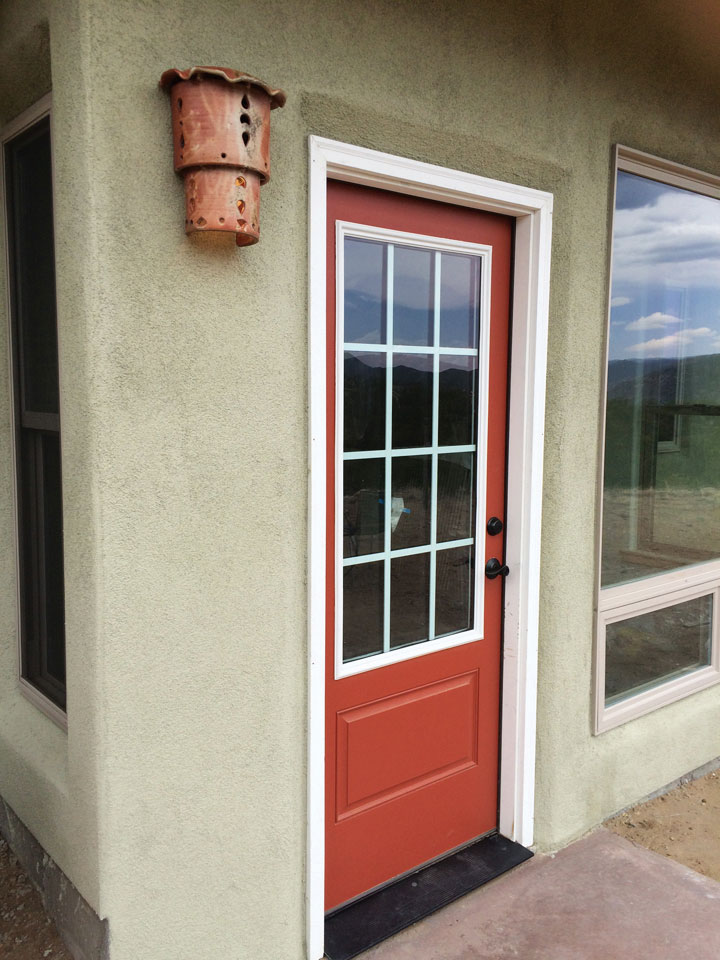
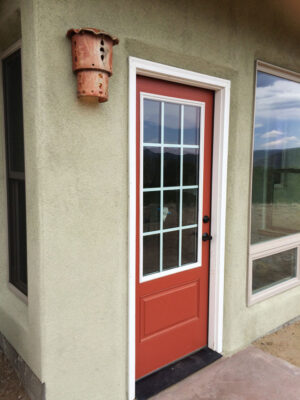
Of course, all of the electrical outlets as well as the light switches needed cover plates. I opted for switches which incorporated dimmers for all the recessed LED fixtures. All exterior sconce lighting had to be shielded in order to meet county codes and I was happy to oblige. These types of lights are great to help minimize ambient light pollution and maintain “dark skies” for stargazing. The sconce for the front door was a gift from potter Riff Fenton of Within Clay Walls in Saguache. This lovely ceramic sconce had once adorned his home, but after a remodel, ended up in the weeds in his backyard. After a simple cleaning, it was a perfect fit for the new home. Back inside, a ceiling fan was mounted to one of the spruce beams in the great room for year-round air circulation.
Part of Kenny’s job as finish carpenter was to trim out the closets and the kitchen pantry, creating shelves and hangers in those spaces. The design of these worked to maximize the space very efficiently. My previous home in Salida had only one closet. This home has four closets, a utility room and a kitchen pantry. I can hardly believe how much storage space I now have.
After the finish carpentry was completed, the floors got several coats of sealant to protect and enhance their color. When the floors were fully dried, all the appliances were brought in and hooked up. This includes the wood burning stove chosen for this home. I went with a high efficiency, small profile stove, lined with soapstone and designed to heat up to 1,300 square feet. Having heated with wood for the past twenty-plus years, there was one thing I wanted to do differently, and that was to elevate the stove so it did not require constant bending down to load, light and clean it. To this end I investigated a few possible options and came up with an idea to place the entire stove on a stone pedestal. Of course, this had to be shaped stone with flat surfaces. I called a friend in Coaldale, Russ Hinman, who is a stone sculptor and asked where he sourced his raw materials. When he heard of my project, he invited me down to see his “bone pile” of stone and had set aside four pillars of granite which stood about nine inches tall. We decided that with a little modification, these would be perfect for my project. Being the good guy that he is, not only did he drill pilot holes for the leg supports and round out the exterior-facing stone, he then gifted them to me as a “house warming” present. How appropriate!
Next month, the finishing touches, final inspections and bank financing. Stay tuned.